
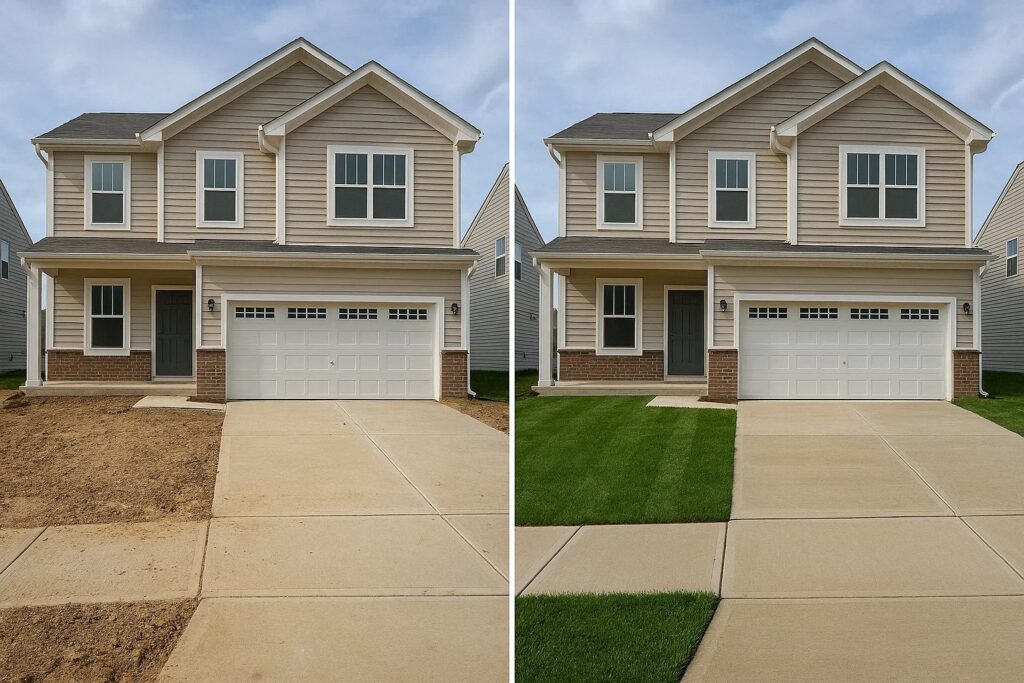
A lush, green lawn can transform the look of your home. It’s a landscaping project that can add value and curb appeal. But achieving that perfect lawn isn’t always easy.
Sod installation is a popular choice for homeowners wanting instant results. It’s quicker than seeding and can provide a mature lawn in a matter of weeks.
However, successful sod installation requires careful planning and execution. From choosing the right sod type to understanding the square feet of your lawn, every detail matters.
This guide will provide essential tips for successful sod installation. Whether you’re considering a DIY sod installation or hiring professional sod installation services, these tips will be invaluable.
We’ll cover everything from preparing your lawn to watering the sod post-installation. We’ll also discuss sod installation costs and how to find reliable sod installation companies near you.
So, let’s dive in and learn how to transform your outdoor space with a successful sod installation.
Understanding the Basics of Sod Installation
Before you start, it’s vital to grasp the essentials of sod installation. This process is straightforward but requires attention to detail.
Sod is a quick way to establish a beautiful lawn. However, it requires proper preparation and maintenance to thrive.
Choosing the right time for sod installation is crucial. Typically, late spring or early fall are the best seasons.
Understanding sod installation involves more than just laying down grass. Knowing how to keep the sod healthy is just as important.
Proper installation can prevent common issues like seams and air pockets. Follow these guidelines to ensure a seamless process.
Choosing the Right Sod Type
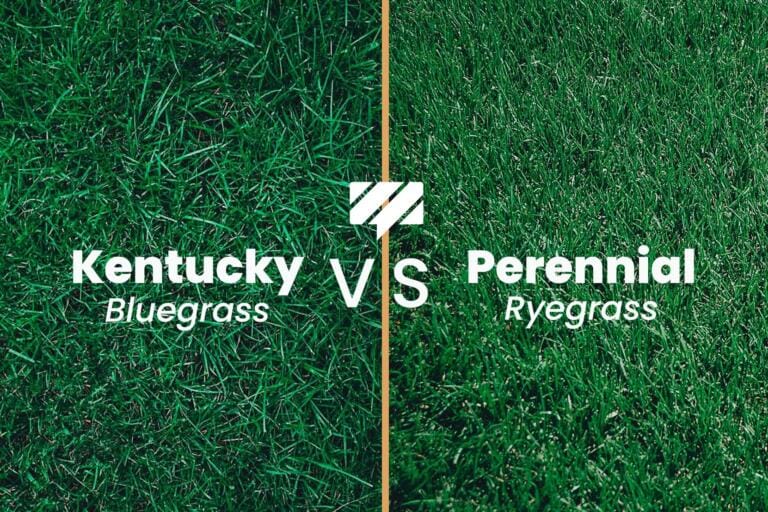
Selecting the right sod type is essential for success. The sod type must suit your climate and soil conditions.
There are warm and cool-season sod varieties. Each has its strengths and weaknesses depending on your location.
Consult with local sod suppliers or experts for advice. They can help you determine the most suitable type for your lawn.
A well-chosen sod type will thrive in your environment, providing a lush, lasting lawn.
Calculating Square Feet for Sod
Accurate calculations ensure you purchase the right amount of sod. Measure your lawn area carefully to determine the number of square feet needed.
Use a measuring tape or a digital measuring tool for precision. Break your yard into squares or rectangles and calculate each area.
Add these measurements together to find the total square footage. This step is crucial to avoid overbuying or underbuying sod.
An accurate estimate helps optimize sod installation costs and prevents wastage. Planning ahead saves both time and money.
Preparing Your Lawn for Sod Installation
Preparation is key to a successful sod installation. Start by clearing your lawn of debris such as rocks and old grass.
Use a sod cutter if necessary to remove any existing turf. This ensures a clean slate for your new sod.
Next, loosen the topsoil with a rake to a depth of 4-6 inches. This promotes good root contact and growth.
Ensure the soil is free of any large clumps or compacted areas. This will prevent air pockets that could hinder sod rooting.
Proper preparation also involves considering sun exposure, as it affects sod growth. Position your sod to receive optimal sunlight.
Soil Preparation and Testing
Testing soil pH is vital for sod success. Proper pH levels foster healthy sod development and durability.
Amending the soil with organic materials like compost improves its quality. This step enhances drainage and promotes root establishment.
Address any deficiencies indicated by the test results. A nutrient-rich base ensures a thriving sod lawn.
Call Sod and Beyond Landscaping team to get your Soil tested.
The Importance of a Level Surface
A level surface is crucial when preparing for sod installation. Uneven terrain can lead to gaps and poor root contact.
Use a lawn roller or rake to smooth the soil. Pay close attention to low spots and elevations.
Check the entire area with a level tool for accuracy. This minimizes potential pooling of water, which could damage sod.
A well-leveled ground lays the foundation for even sod growth. It ensures your lawn looks seamless and healthy over time.
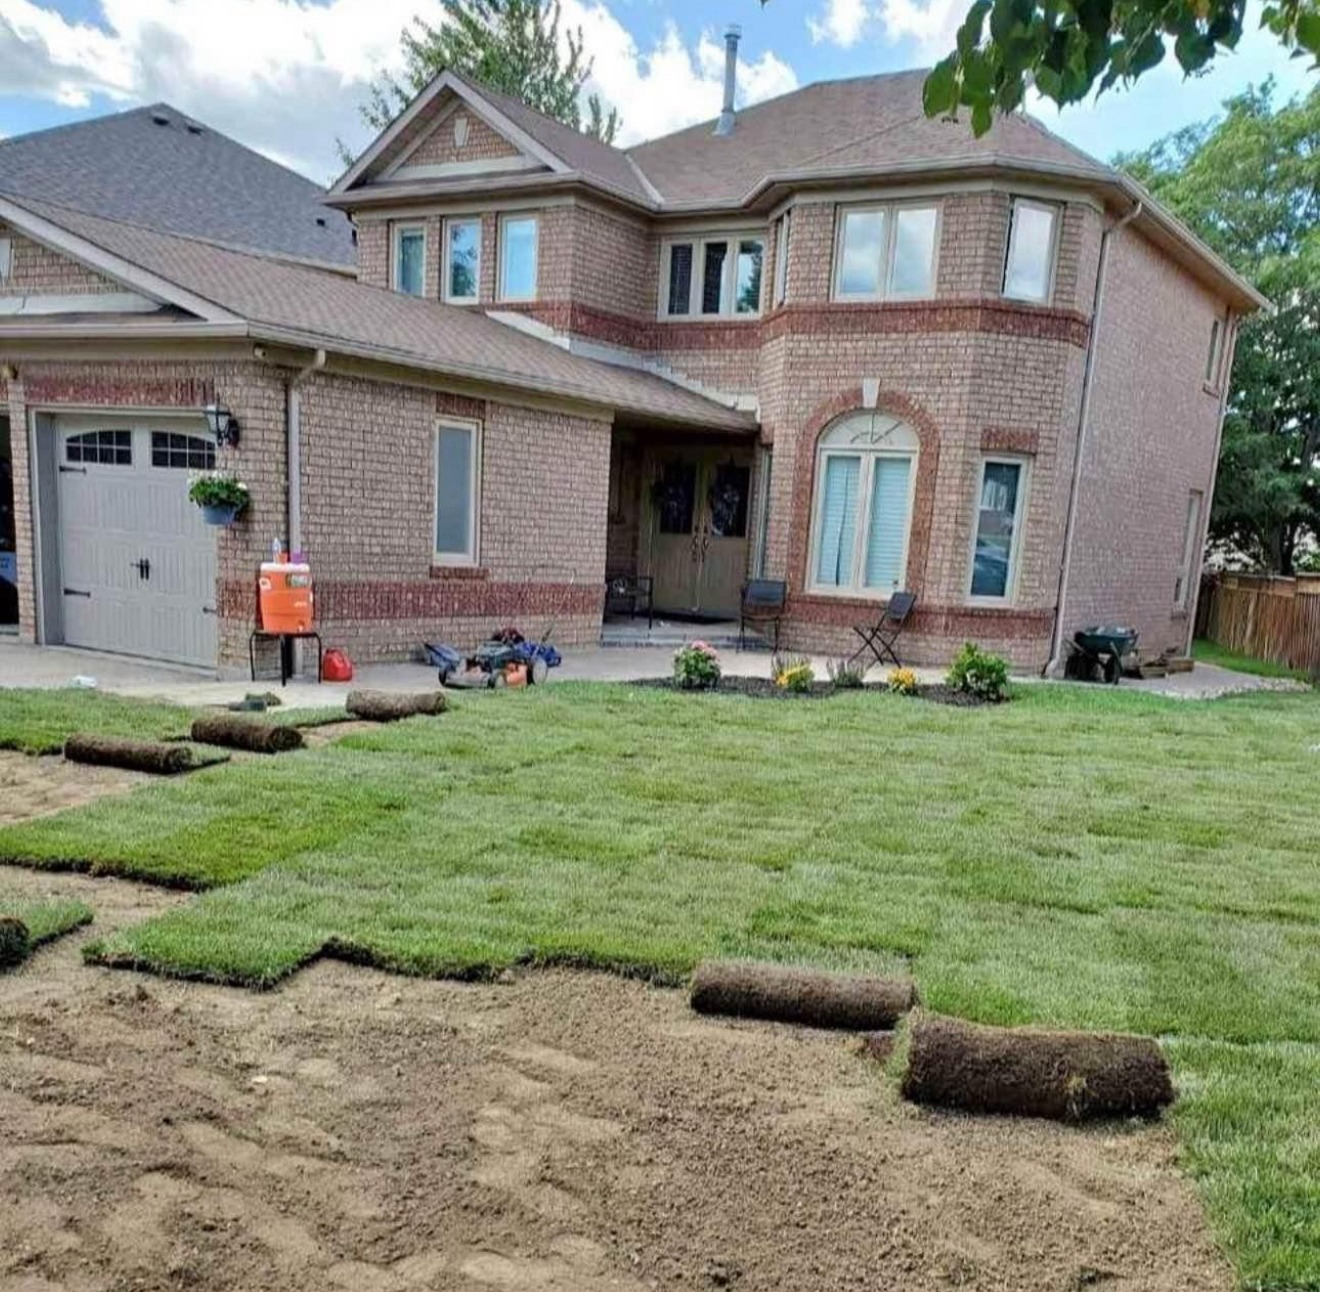
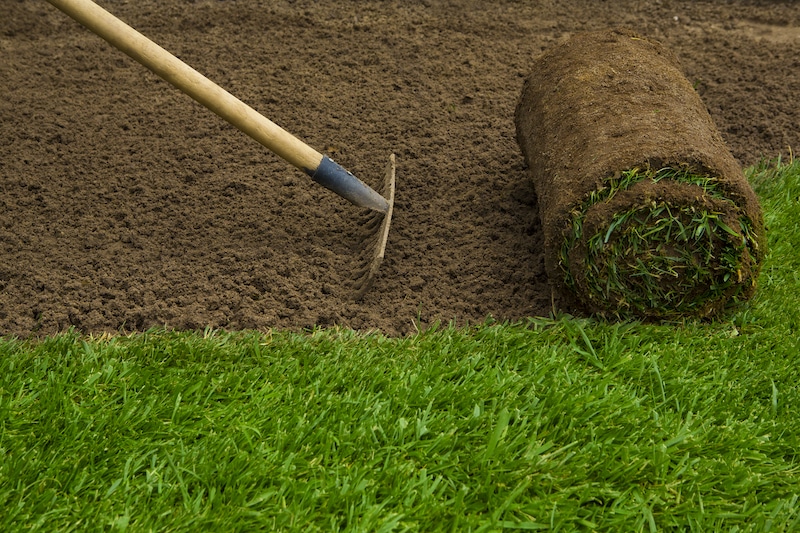
Laying the Sod: Step-by-Step Guide
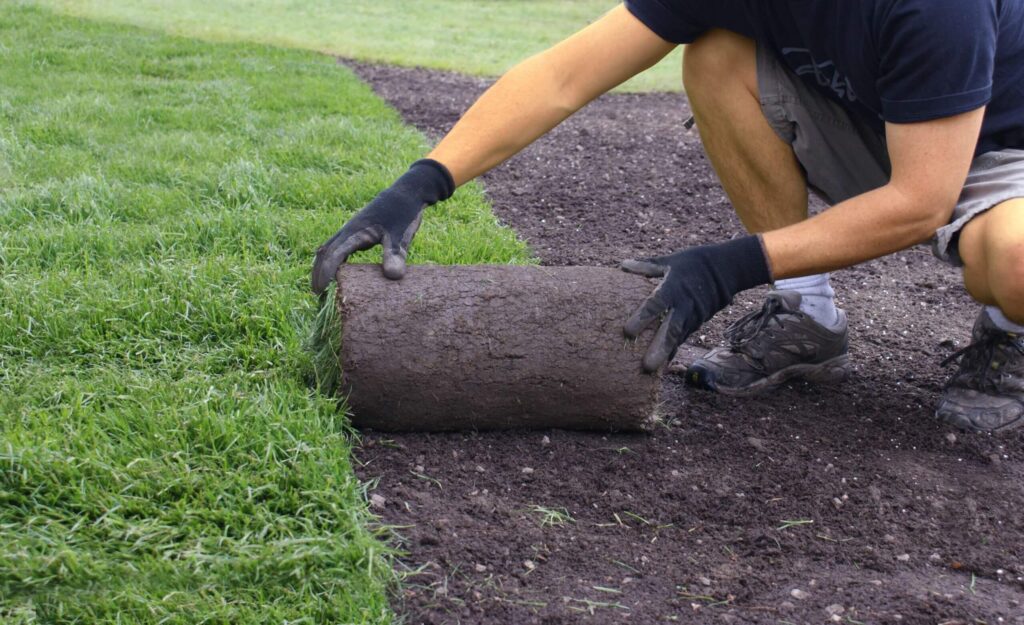
Start by unrolling the sod along a straight edge, like a sidewalk or driveway. Aligning from these edges helps with a uniform appearance.
Gently press the sod into the soil to ensure good contact. This step is crucial to establish a secure foundation for root growth.
Stagger the sod joints in a brick-like pattern to avoid seams. This technique reduces the chance of gaps forming between the pieces.
Use a utility knife to cut the sod for precise edges. This is especially important around garden beds and pathways.
Avoid stretching the sod, as this can lead to tears. Consistent pressure helps maintain sod integrity during installation.
Avoiding Air Pockets and Ensuring Proper Overlap
Air pockets prevent proper root contact. To avoid them, lightly roll over the sod with a lawn roller.
Overlap the sod slightly to ensure no open spaces are left. This reduces the risk of drying out and promotes uniform growth.
Stomp down along the seams of the sod rows. This compacts the sod against the soil, minimizing air gaps.
These steps help ensure a seamless and professional finish. A tight fit encourages strong and healthy sod growth.
Trimming and Fitting Sod Around Obstacles
When fitting sod around obstacles like trees or flowerbeds, precision cuts are essential. Measure the area and cut the sod accordingly.
Use a sharp blade for clean cuts. This minimizes the risk of ripping or tearing the sod.
Carefully lay the trimmed pieces close to objects. This ensures complete coverage without any exposure of bare soil.
Adjust the sod with small shifts to fit neatly. Achieving a snug fit creates a neat appearance and prevents weed growth.
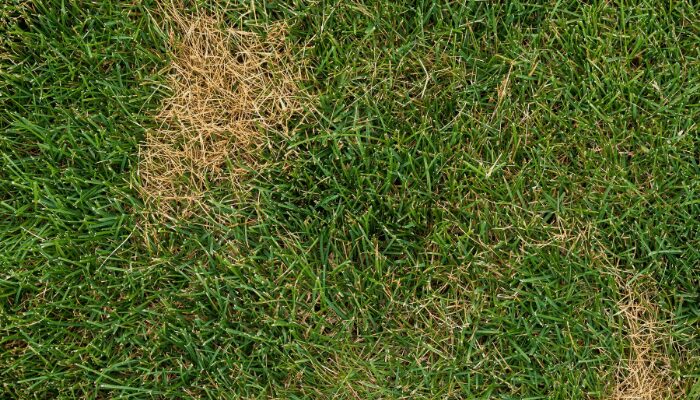
Watering and Maintenance Post-Installation
Once sod installation is complete, focus shifts to immediate care and upkeep. Watering the sod is the first critical step.
Proper irrigation within the first hour of installation is crucial. This helps the sod settle and encourages root growth.
Be vigilant about maintaining consistent moisture levels in the initial weeks. This is key for successful sod establishment.
Avoid walking on the sod until it roots firmly. Foot traffic can cause displacement and inhibit growth.
Monitor the sod daily for signs of dryness. Early intervention can prevent potential damage.
Initial Watering Schedule
Proper watering starts immediately after installing the sod. Begin by soaking the sod thoroughly for about an hour.
The goal is to saturate the soil beneath each piece. This ensures that roots have ample moisture to grow.
Continue watering the sod twice daily for the first two weeks. Morning and evening are ideal times.
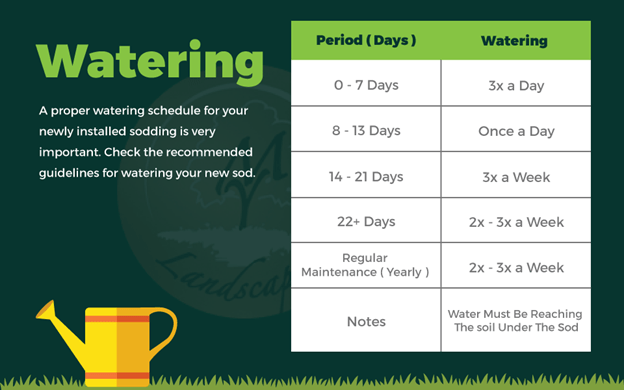
Frequent monitoring is necessary to adjust to weather changes. During hot periods, increase watering frequency.
Long-Term Maintenance Tips
After the initial period, gradually reduce watering. Transition to a normal lawn maintenance routine.
Mow the lawn for the first time once the sod roots well. This usually occurs after about three weeks.
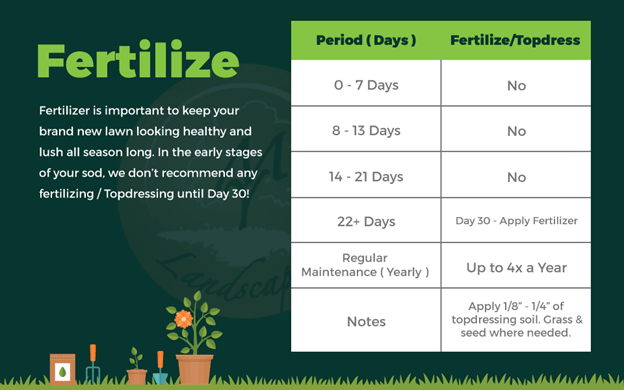
Fertilize the sod after six weeks. Choose a high-quality fertilizer to promote healthy growth.
Routine aeration can keep the lawn healthy and lush. This ensures air, water, and nutrients reach the roots.
DIY vs. Professional Sod Installation
When deciding between DIY and hiring professionals, consider your time and experience. DIY sod installation suits those with hands-on skills.
You’ll need to be ready for physical labor and precise work. Mistakes can lead to costly repairs.
On the other hand, professional services offer expertise and efficiency. They ensure high-quality results with less stress for you.
Professionals handle soil prep, grading, and edging. They also have access to better tools and equipment.
Ultimately, weigh your budget and confidence in handling the project. Choose the option that best fits your needs and skills.
Contact Sod & Beyond Professional team for your next Sod Installation in Windsor Project
When to Consider Professional Sod Installation Services
Consider professional sod installation if your lawn has complex layouts or challenges like slopes. Pro experts handle intricate designs more easily.
Time constraints also make hiring experts practical. They complete the job faster and with assured quality.
Choose professionals for large projects where precision is key. This prevents errors that can disrupt the entire landscape.
For best results, verify the company’s reputation. Check past work and client feedback.
Finding Sod Installation Companies Near Me
Sod and Beyond Landscaping offers various Sod Installation and Lawn Maintenance in Windsor and nearby cities.
Understanding Sod Installation Costs
Understanding sod installation costs is crucial for budgeting your landscaping project. Costs can vary based on several factors.
Typically, the price is determined per square foot of sod. However, geographical location also affects costs.
Sod types can influence expenses. High-quality sod generally costs more, but it’s more reliable.
Additional costs include soil preparation, labor, and equipment rentals. These should be considered beforehand.
Read our Article – Sod Installation Cost in Windsor/ Lakeshore/ Essex in 2025
Factors Influencing Sod Installation Costs
Several factors impact the overall cost of sod installation. Understanding these helps in planning a precise budget:
- Size of the lawn (in square feet) needing coverage
- Type of sod chosen, such as warm-season or cool-season
- Soil preparation needs like leveling or fertilization
- Complexity of the landscape, including obstacles
- Choice between DIY and hiring professionals
These elements significantly alter the overall cost estimate.
Estimating Your Landscaping Project Budget
Begin with measuring your lawn area carefully. Calculate the total square feet required.
Research various sod types and their prices in your area. This determines a portion of your budget.
Don’t forget to include labor, tools, and potential additional services. Collecting several quotes provides a clearer cost insight.
Prepare for unforeseen expenses that might arise. Creating a contingency fund helps prevent overspending.
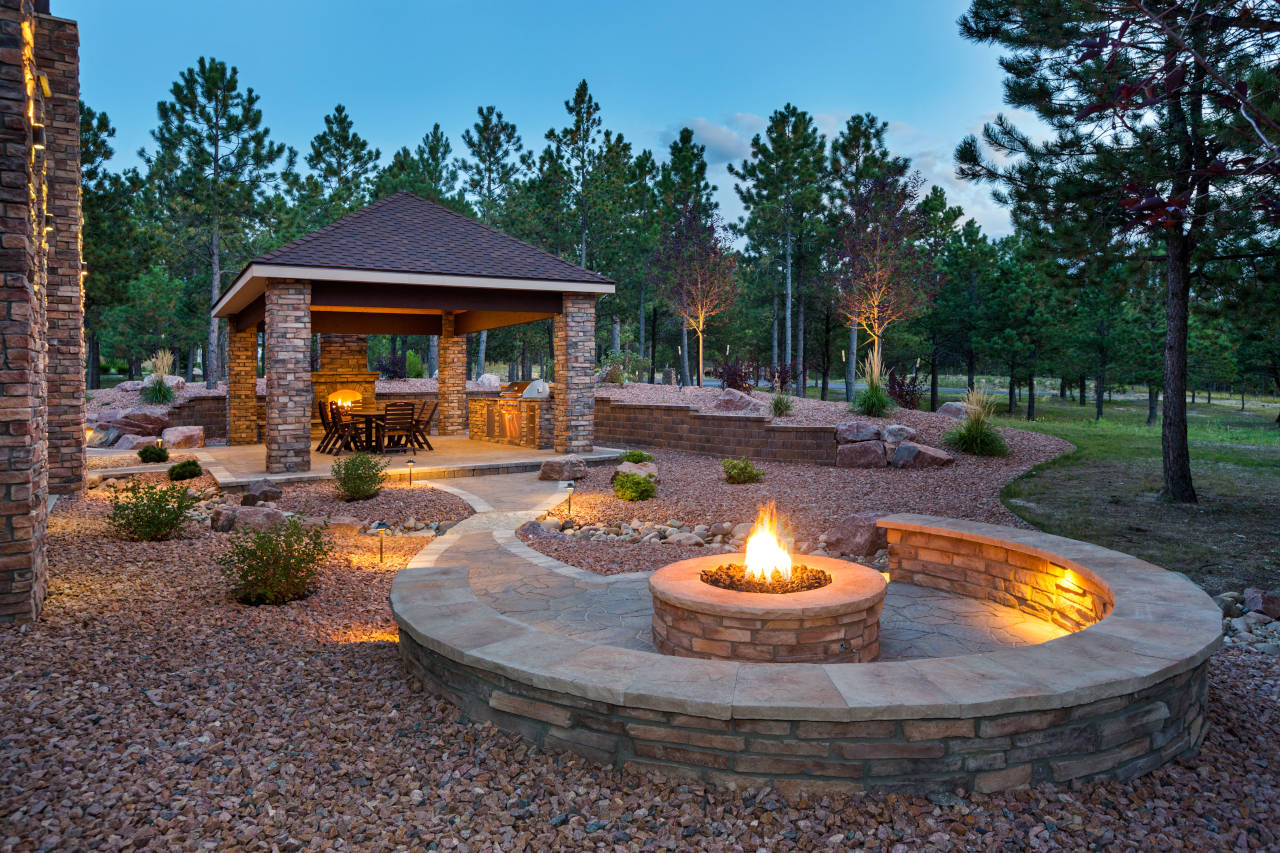
Conclusion: The Benefits of a Well-Installed Sod Lawn
A well-installed sod lawn offers numerous benefits beyond aesthetic appeal. It enhances the overall curb appeal instantly.
Healthy sod helps with soil erosion control. This is beneficial for homes on sloped lots.
A dense sod lawn acts as a natural air filter. It traps dust and reduces greenhouse gases.
Properly installed sod is resilient. It withstands foot traffic, making it ideal for families with kids and pets.
Moreover, sod cools the surrounding air. This contributes to a comfortable outdoor space, especially during hot months.